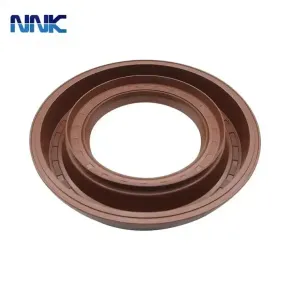
How to replace an oil seal on a truck?
Maintaining your truck's optimal performance involves periodic checks and replacements of essential components, and one such critical part is the oil seal. Here's a comprehensive guide on how to replace an oil seal on your truck, ensuring longevity and efficient operation.
1. Gather Necessary Tools and Materials:
Before embarking on the replacement process, make sure you have the following:
New oil seal
Screwdrivers
Pliers
Hammer
Seal puller or pry bar
Clean rags
Oil or lubricant
2. Safety First:
Ensure the truck is on a level surface, engage the parking brake, and wear appropriate safety gear, including gloves and safety glasses.
3. Locate the Oil Seal:
Identify the position of the oil seal. Common locations include the front and rear of the engine, transmission, or differential.
See also:Fifth Wheel Camper vs Travel Trailer: Differences
Ultimate Guide to Grey Blue Car Wraps
Where can I find base camps for sale?
10 Reasons Why You Should Carbon Wrap Your Car
The Benefits of Using Off Grid Travel Trailer
The Ultimate Guide to Small Dual Axle Trailers
Wondering how black gold car wrap reflects wealth?
4. Drain Oil (if necessary):
If the oil seal is located in a component that holds oil, drain the oil to prevent spills during the replacement.
5. Remove Obstacles:
Clear the area around the oil seal. This may involve removing components like belts, pulleys, or other items obstructing access.
6. Extract the Old Oil Seal:
Use a seal puller or pry bar to carefully remove the old oil seal. Take precautions not to damage the surrounding components.
7. Clean the Area:
Thoroughly clean the area where the new oil seal will be installed. Remove any debris, dirt, or remnants of the old seal.
8. Apply Lubrication:
Before installing the new oil seal, apply a thin layer of oil or lubricant to the inner lip. This ensures proper lubrication during initial operation.
9. Install the New Oil Seal:
Position the new oil seal in place. Use a seal driver or a block of wood and a hammer to gently tap the seal into position. Ensure it sits flush with the surrounding surface.
10. Check for Proper Alignment:
Verify that the oil seal is evenly seated and aligned. It should not be tilted or protruding unevenly.
11. Reassemble Components:
Reinstall any components that were removed to access the oil seal. This may include belts, pulleys, or other parts.
12. Refill with Oil:
If oil was drained, refill the component with the appropriate amount and type of oil.
Previous: The Benefits of an Air Suspension System
Next: How EPDM rubber sealing strips provide superior protection against the elements
- 0


